AWS Site to Site VPN with pfSense
Setting up a Site to Site VPN between a pfSense home lab and AWS VPC only takes a few moments but I had a difficult time finding an all inclusive guide that worked. The main guide I used was from 2017 and had a critical flaw that I spent hours troubleshooting. I will outline the steps I took below to successfully establish the connection. This guide assumes you have an AWS VPC already and have a basic understand of networking, setting up AWS services and your pfSense GUI.
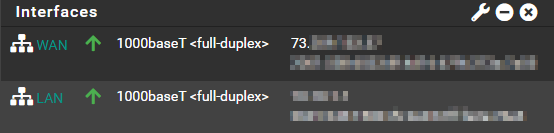
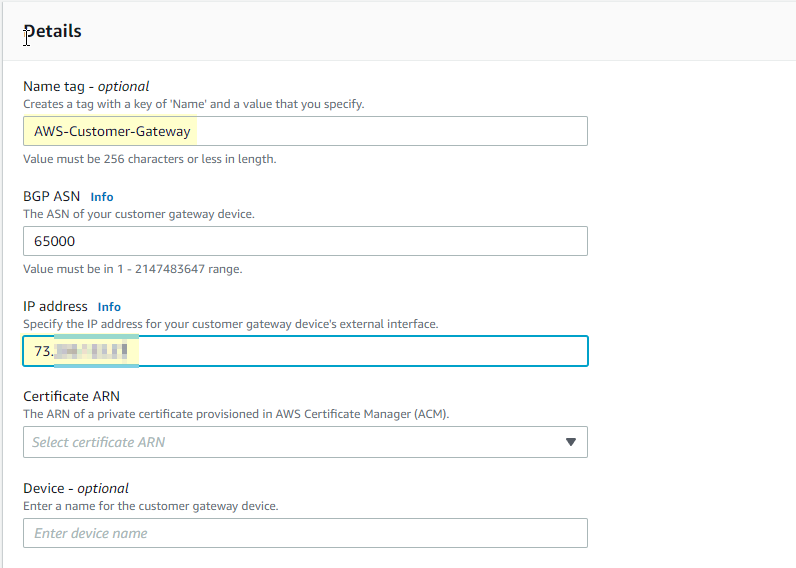
- In your AWS console we will create a customer gateway by navigating to VPC > Customer Gateway > Create Customer Gateway. Name it appropriately, I’m choosing “AWS-Customer-Gateway” and under “IP address” put the IPv4 for your pfSense WAN. That can be found by logging into your pfSense and looking at your interfaces.

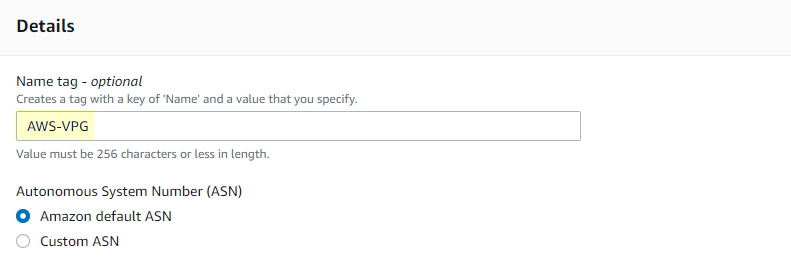
- Next we will create the Virtual Private Gateway (VPG) which is underneath Customer Gateways in the navigation pane. All you need to do is name it, use the Amazon default ASN.
- After the VPG is create, you need to attach it by clicking “Actions” near Create Virtual Private Gateway, choosing “Attach to VPC”, and selecting your VPC from the drop down.


- Once it is attached, then we can create the Site to Site VPN Connection which is underneath VPG in the navigation pane. You need to name it and select the VPG and Customer Gateway we created earlier from the drop downs.
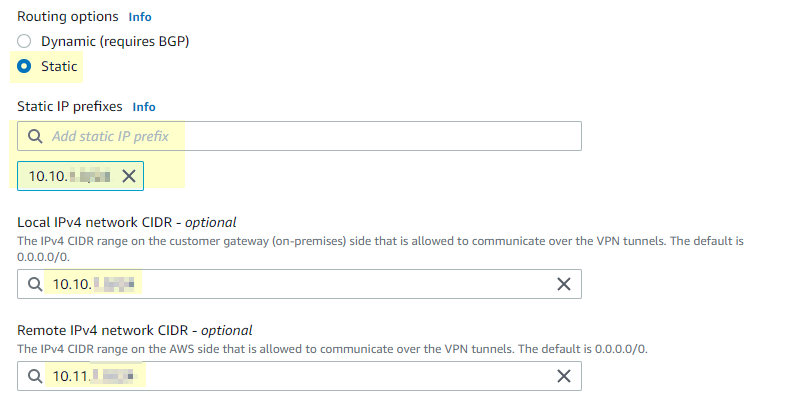
- I can’t stress this next part enough, choose static routing. This was my fatal flaw I mentioned at the beginning. I could not get it to work with Dynamic and BGP. IPSEC would be up but no tunnel was formed. You will add the pfSense LAN IP range to static IP prefixes and Local IPv4 network CIDR. Add your AWS IPv4 CIDR to Remote IPv4 network CIDR. You can leave the rest of the settings to default.
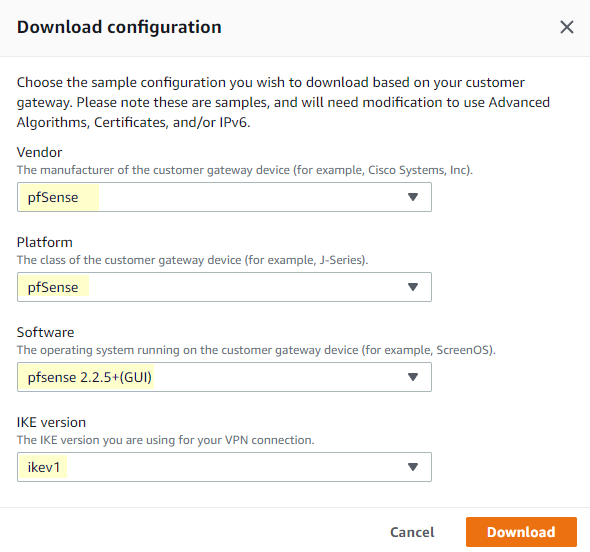
- Once you create the connection, it will take several minutes to finish. You should be able to click the “Download configuration” button near “Actions” after a minute or so. Make sure you choose pfSense. We’ll use this file in a few moments.
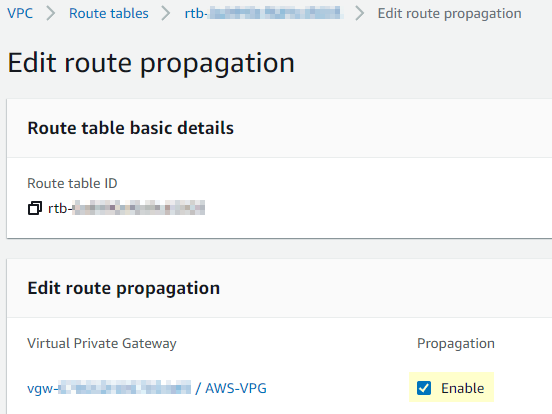
- While that is creating, the last step we need to take in AWS is to propagate the route in the subnet routing table of VPC. Just check enable to propagate it.
- Now we will use that downloaded configuration file but we need to switch to the pfSense web GUI first. Under VPN, select IPsec, and then “Add P1” aka Phase 1. This is where our configuration file we downloaded earlier comes in. You should read that configuration file in it’s entirety before proceeding. It will have all the info you need to establish the tunnel. There are going to be 2 tunnels in the file for redundancy and 2 phases in each tunnel.

- The following parameters need to be entered or changed from default in P1.
Description > Name it, I chose “AWS VPN Tunnel 1”
Key Exchange version > IKEv1
Remote Gateway > Line E under General info in config file
Pre-Shared Key > Line E under Phase 1 proposal
Encryption Algorithm > AES, 128 bits, SHA 1, DH group 2
Max failures > 3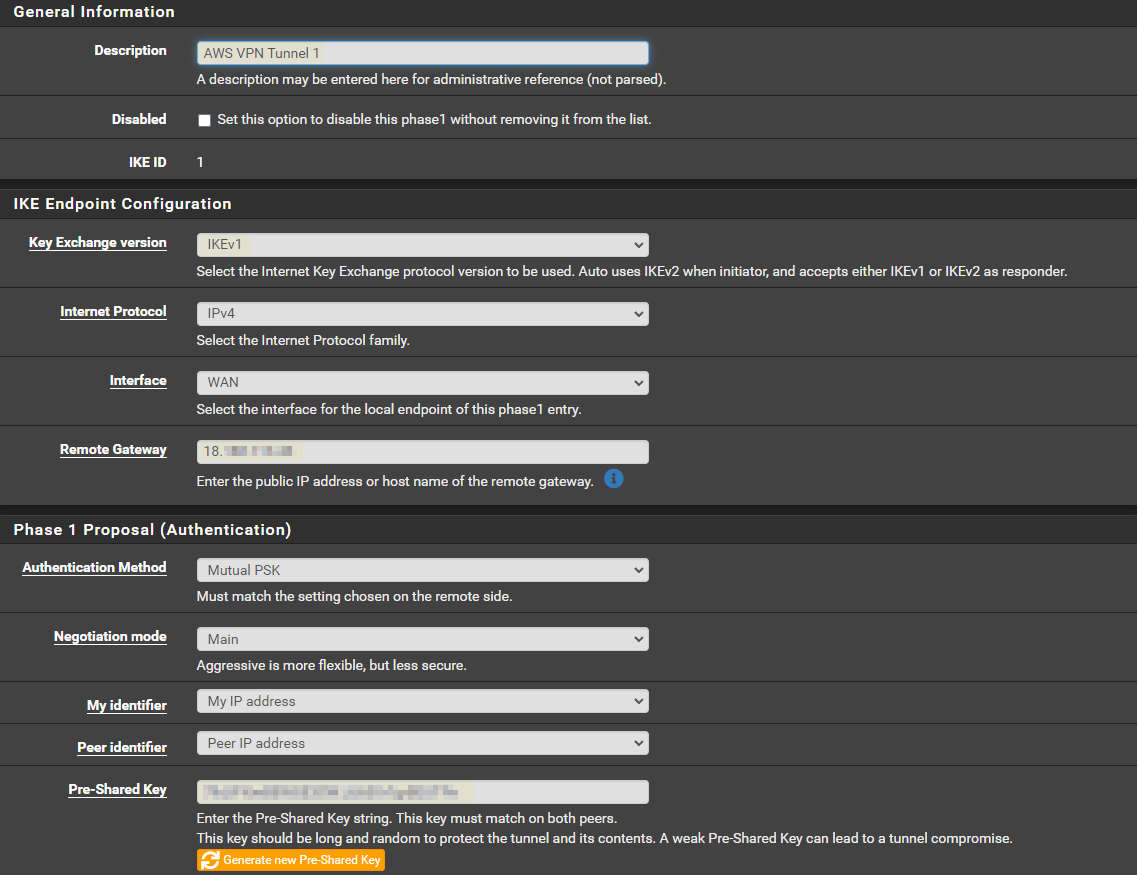


- After P1 is created, you need to add a P2 under it by clicking “Show Phase 2 Entries” and then “Add P2”.
- The following parameters need to be entered or changed from default in P2
Remote Network > IPv4 CIDR of your AWS VPC subnet
Encryption Algorithms > Change AES to 128 bits and unselect AES128-GCM
Has Algorithms > Unselect SHA256 and select SHA1
Automatically ping host > private IP of a running EC2 instance in the same subnet (this will be elaborated on later)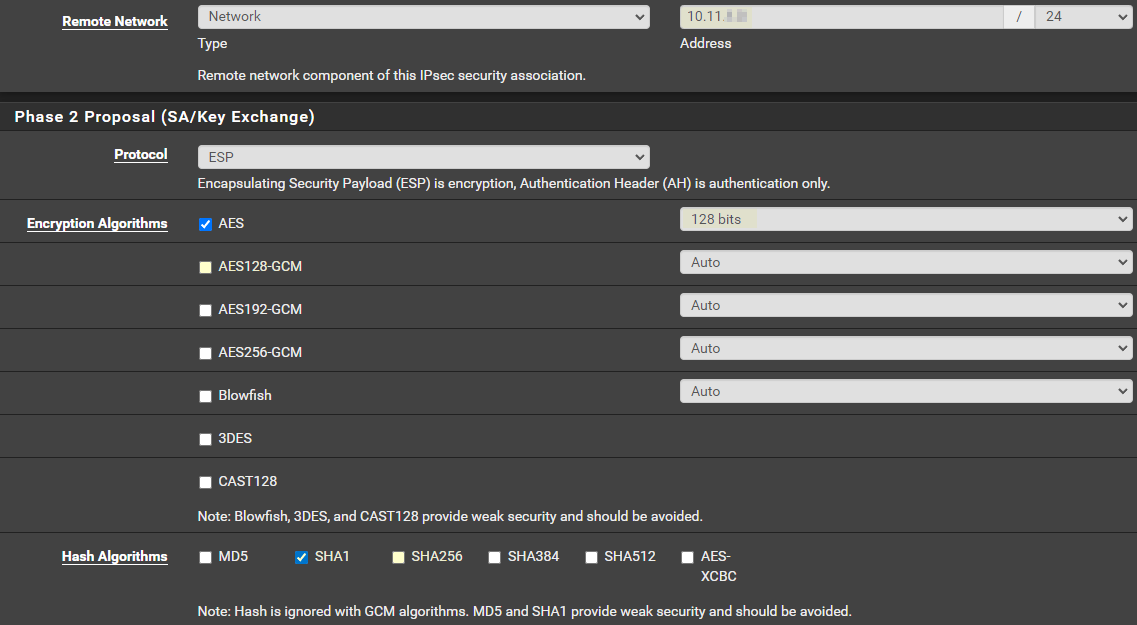

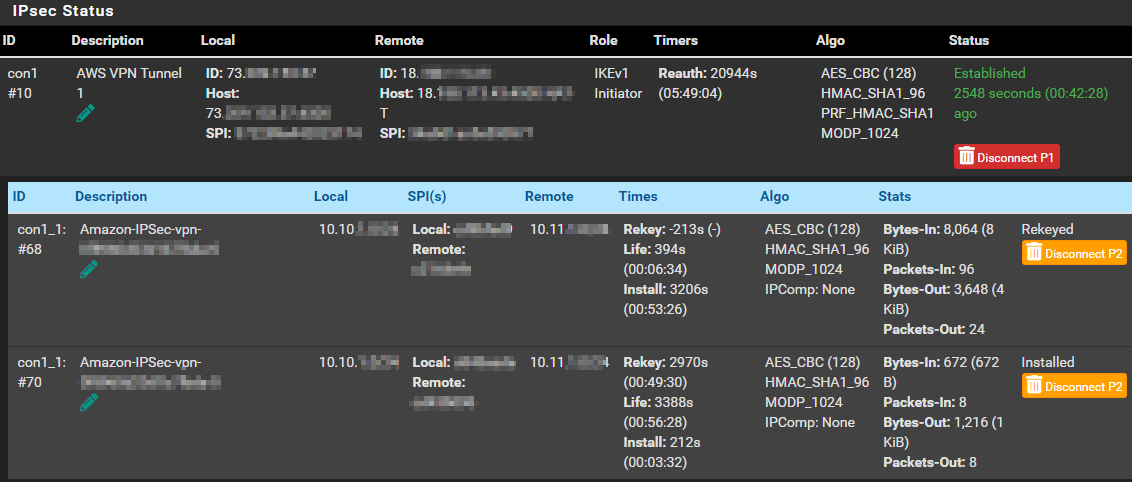
- After both P1 and P2 are set, you need to apply the changes. Once applied, navigate to “Status” > “IPsec” and you should have an option to connect P1 and P2. It may auto connect after applying the changes. If successful, you will have an established status and can see packets in/out if you show child SA entities
- You can also confirm on the AWS side but selecting your VPN connection and clicking “Tunnel details” It should show UP but might take a second.

- I would also check connection by pinging an ec2 instance from your home network by private IP. You will have to allow IPv4 IMCP via security groups for your instance and VPC. It’s a good way to know if a tunnel goes down or not. I may of broken one of the tunnels experimenting and AWS was very quick to email me informing me it went down. You can set up a T2micro instances for free.

- Once the first tunnel is established, follow the same steps for the 2nd redundant tunnel. The only difference between the two tunnels are going to be the Description, Remote Gateway and Pre-Shared key. Otherwise they should be the exact same settings.
- If you run into any issues establishing the tunnel, look at the config file from AWS. You may have to allow UDP 4500. I did so preemptively along with UDP 500 and ESP. If IPsec shows up but the tunnels are still down, there’s an issue with your BGP, make sure you chose static routing earlier instead of dynamic so you don’t have to waste hours troubleshooting like me.
Discussion disabled.
Category: Networking